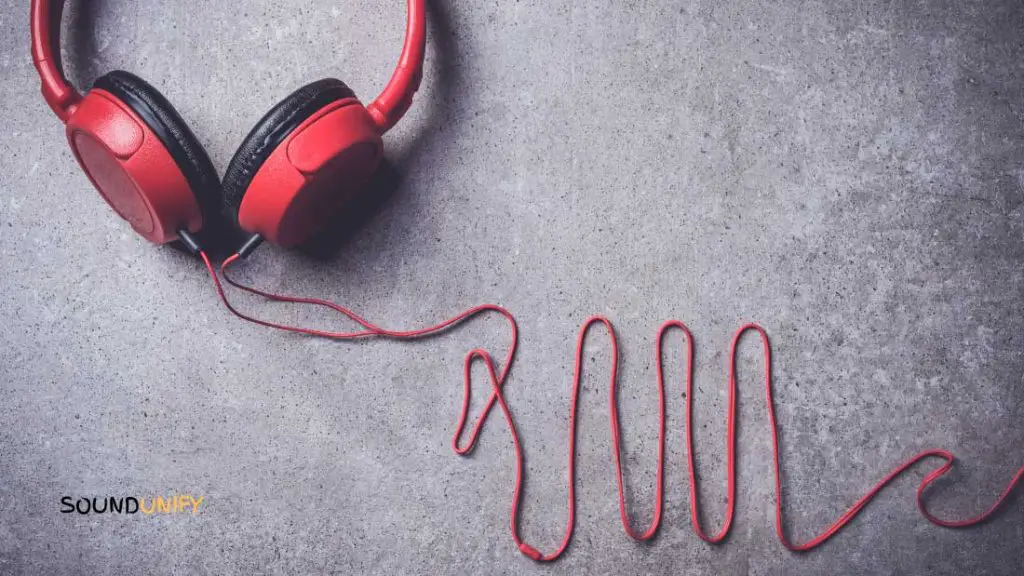
As a frequent user of wired headphones, I understand the struggle of managing cords that always get tangled.
But did you know that proper cable management can not only keep your cords tangle-free but can also prevent damage and extend the life of your headphones? That’s right!
In this article, we’ll explore the importance of proper cable management for wired headphones. Also, offer tips and suggestions on how to organize headphone cords.
You can keep your headphones in excellent condition with a few simple steps while ensuring they don’t become tangled.

Why Cable Management Is Important?
Wired headphone cable management is necessary when using headphones with a long cable length.
Cable management helps to keep the cord from getting tangled and reduces the risk of damaging the wires. Proper cable management can also reduce the amount of noise from the environment.
Proper cable management for wired headphones is essential to ensure the longevity and performance of the headphones.
Good cable management also means that the wires will stay tangle-free and prevent them from coming loose.
Not only that, but proper cable management also prevents damage to the internal structure of the headphones due to excess tension or strain.
This can ultimately lead to sound leakage, poor connectivity, and even breaks in the cable.
Cable management is essential for music professionals and audiophiles who rely on wired headphones for the best sound experience.
How to Wrap Headphone Cords Without Damaging Them?

Wrapping your wired headphones can be a great way to protect them from damage and keep them from tangling.
But it’s essential to do it correctly to avoid further damage. Here are some best practices for wrapping your wired headphones the right way.
- Ensure enough cord length to wrap the cables without stretching them too tight. If necessary, use an extension cable or untangle the cords before wrapping.
- When wrapping your headphones, start by making a loop with one side of the cable, then tuck the loose end of that side through the loop before pulling on it to tighten it. Then make another loop with the other side and repeat. You should end up with two loops facing each other in opposite directions.
- Once you have both sides wrapped into loops, twist each loop in opposite directions until they become tight and snug against each other. This will help keep your cables secure and prevent them from getting undone or tangled when stored away.
- Tie off both loops together at the top to stay connected when not in use. Make sure not to tie them too tightly, as this could cause even more damage to your headphone wires over time.
Following these simple steps, you can easily wrap your wired headphones properly and help keep them safe from damage and tangles for years to come.
How to Keep Your Headphone Wires from Tangling?
Tangled headphone wires can be one of the most annoying and frustrating parts of owning a pair of headphones.
Whether it’s due to a lack of storage, improper handling, or general wear and tear, tangled wires are an inevitable problem. That all headphone users will eventually face.
Common Causes Of Headphone Wire Tangling
Headphone wires can become tangled due to a variety of different causes.
- The headphone cord needs to be correctly wound or secured: Take the time to wrap and connect the cable after use properly to avoid quickly ending up with a tangled mess. This can cause the cable to get caught on nearby objects, such as clothing, furniture, bags, and other people.
- Headphones being stored improperly: Not keeping your headphones in a case or other secure area means the wires are more likely to move around and eventually become tangled.
- Improper cable length or weight: Too long or heavy can cause tangling due to excess movement.
- Poor cord quality: Low-quality cords will wear out quicker, making them more likely to become tangled.
Techniques For How to Untangle Headphone Wires Without Damaging Them
- Invest in a headphone case: A headphone case is a great way to ensure that your wires stay tangle-free. This can help store your headphones in between uses and provide an easy way to carry your headphones.
- Use a twist-tie or cord wrap for keeping wires organized: Using a twist-tie or cord wrap when you’re done wearing your headphones is a great way to keep the cords neat. This makes it easy to store and unpack without worrying about tangled cables.
- Use a cable clamp or clip: Cable clamps or clips are an excellent tool for keeping headphone wires organized while in use or stored away. These devices can control the cables in check, preventing excess movement and tangling.
- Use something to “catch” the wires: Placing something heavy on top of your headphone wires while they’re unused can help to keep the cords in check and prevent them from becoming a tangled mess.
- Wind the cords before storing them away: Taking the extra time to wind and secure them on your headphones before turning them off and packing them away can help prevent tangling.
By following these steps, you can help ensure your headphone wires stay tangle-free and out of harm’s way for years to come.
With some simple maintenance and proper cable management for your wired headphones, you’ll be able to enjoy your music for longer.
Prevention Tips To Avoid Future Tangling

Proper headphone cable management is key, whether you’re an avid audiophile or prefer a tangle-free listening experience.
Fortunately, there are a few simple yet effective ways to keep your wires from getting tangled and knotted up.
- Store your headphones when not in use. If you’re finished listening for the day or taking a break from your music, keep them in a case or wrap them up so that the cords remain untangled. You can also invest in a headphone holder, allowing you to easily hang your headphones up and out of the way when not using them.
- It’s also helpful to avoid wrapping headphone cables too tightly. Cords should be loosely coiled instead of tightly wound, so they don’t become twisted and tangled when uncoiled again. When transporting headphones, use a carrying case with separate compartments for each earbud and cable. So they don’t become entwined as you move around. Avoid stuffing headphones into bags where they can get jumbled up with other items.
- Connector straight into the device. When plugging in your headphones, it’s best to plug the connector straight into the device rather than yanking at the cord to make it fit properly. This will help prevent wear and tear on the headphone jack and cable over time, which can lead to tangling issues down the line if not handled correctly.
- Remember that quality matters. Buying better cables with higher durability means fewer tangles over time since they won’t fray or break as easily as cheaper ones.
How to Fix a Bad Aux Cable Connection?
A variety of issues can cause lousy aux cable connections.
- One of the most common is when the cables are worn out or damaged, either from bent, stretched, torn, or exposed to moisture or other liquids.
- Poor contact between the plugs and jacks can cause weak signals and dropped audio.
- Another cause might be electrical interference from nearby devices such as TVs, cell phones, and computers.
- Incorrect wiring in the headphone jack could be causing issues with the connection. These problems can lead to distorted sound quality and reduced volume levels.
Steps For Diagnosing And Fixing The Issue
When it comes to wired headphones, cable management is essential in ensuring that your audio experience is as good as possible.
Even a minor problem with the aux cable can lead to issues with sound quality or even complete audio failure.
Knowing how to diagnose and fix the issue before it gets out of hand can save you time and money.
- Check the Aux Cable: The first step is to check the aux cable and see if it is damaged. Inspect the physical condition of the cable and look for any signs of wear or tear. Make sure the connector ends are securely connected to the headphones and device.
- Inspect the Headphone Jack: The next step is to inspect the headphone jack and ensure it is in good condition. Ensure that it is not bent or damaged and that no dirt or debris is blocking the connection.
- Check for Electrical Interference: Look at the immediate surroundings for any electrical noise that might interfere with the audio connection. Electronic devices such as cell phones and TVs can cause interference if they are too close to the audio source.
- Check the Wiring: Wiring problems can cause bad connection issues. Look at the plug’s wiring and ensure it is correctly connected to the cables. If you see any exposed wires, they should cover with electrical tape.
- Replace the Cable: If none of these steps work to improve the connection, it may be time to replace the cable. High-quality aux cables are generally more durable and resistant to damage than cheaper models.
How to Wire the Aux Cable?
Wiring headphones with an aux cable is a straightforward process that can save you a lot of money. It’s essential to know the tools and materials needed for wiring and the step-by-step guide to ensure everything goes smoothly.
The main tools required are wire cutters, a soldering iron, solder, and tape or electrical insulation.
You will also need an aux cable for wiring your headphones, which should have at least two exposed wires at each end—red and white/black—which correspond to the right and left audio channels, respectively.
- Read this: 10 Steps How to Solder Headphone Wires
Step-by-Step Guide For Wiring An Aux Cable
To begin the wiring process, carefully strip back the outer casing of the aux cable until you can see the inside wires. Ensure there is enough exposed wire to work with so it won’t be too difficult to sell it later.
Then locate the left and correct audio channel wires (red and white/black) within the aux cable and twist together any strands of wire. That may have come apart during stripping, then cut away excess cables.
Next, take your soldering iron and apply heat to the exposed audio channel wires before adding the solder until they are covered in a thin film.
If necessary, use electrical insulation or tape to cover any exposed wire parts after soldering. Finally, connect one end of your newly wired headphones to your device (e.g., phone or laptop) and enjoy your new set of wired headphones.
How to Manage Long Headphone Cables?
There are many ways to manage and reduce the tangle of headphone wires that often occur.
From special cord organizers to simple DIY solutions, plenty of options are available for those looking to keep their headphone cables from becoming tangled.
- Wrap and Tie: One of the most basic and traditional ways to prevent long headphone cables from becoming messy is to wrap and tie them. This involves gently winding the cord around your hand or another object before tightly knotting it together and securing it.
- Use Cable Claw: Another solution is using a cable claw. This specialized device wraps the headphone wires together and keeps them together when not in use. This makes it easier to coil and store the cables away without tangling up.
- Use a Cable Clip: If you need to separate the wires, a cable clip can be a great way to manage them without wrapping and tying them. The clips come in various sizes and can easily be attached to any surface, such as a desk or wall.
- Invest in a Headphone Case: A headphone case offers protection and convenience. It can keep your headphones secure, organized, and untangled while providing easy access when you need them.
- DIY Hacks: For more creative solutions, you can use multiple DIY hacks to keep your headphone wires organized and tangle-free. From binder clips and rubber bands to DIY cord clips, there are many ways to manage and organize headphone wires with little effort.
Using these tips and strategies, you can manage and reduce the tangle of your headphone wires, making it easier to handle and store them away.
Taking the time to care for your headphone wires can help them last longer and avoid costly repairs or replacements due to damage.
Wireless vs. Wired Headphones

Using wired headphones is a preference among many audiophiles who appreciate their high-quality sound. Wired headphones utilize a physical cable to connect the audio source to the receiver, such as the headphones themselves.
This allows a direct connection between these two components, eliminating any interference from other wireless signals, which can distort sound quality.
Wired headphones also provide an uninterrupted signal and can handle higher power volumes than wireless models. Although this may mean a more powerful sound, it can also cause feedback if not managed properly.
The cables are often long and cumbersome, making them difficult to manage when listening on the go or in small spaces.
In contrast, wireless headphones eliminate most of these problems by using radio frequencies (RF) to send audio signals from one device to another without wires. This type of headphone uses two instruments:
- One that transmits (e.g., phone).
- One that receives (e.g., headphones).
Wireless headphones allow unrestricted movement since no cables are required, and they typically come with advanced features such as noise-canceling technology and longer battery life than wired models.
However, they tend to be more expensive than their wired counterparts and may need stronger signals due to distance or interference from other RF sources like Bluetooth or Wi-Fi devices.
On the other hand, wired headphones are typically cheaper and allow for an uninterrupted signal with less noise interference and higher power levels.
It is essential to consider both types of headphones when determining which model is best for you based on your auditory preferences, budget, and lifestyle needs.
FAQ
Can wireless headphones also be wired?
Many wireless headphones come with an auxiliary cable to use wired. Some headphones may require an adapter to switch between wired and wireless.
How do you shorten headphone cables?
The easiest way to shorten headphone cables is to use cable cutters. To avoid damaging the rings, ensure you make clean cuts. After cutting, you can tuck away the excess cable and secure it with a twist-tie or cord wrap.
Why are headset wires so long?
Headset wires are typically longer than audio cables due to their purpose as an audio connector. This allows the headset to be used in various environments or moved around without constantly adjusting the network environment or cables.
Does wrapping headphones damage them?
If done correctly, wrapping headphones should not damage them. When covering, ensure the cords are exposed without being stretched too tightly. Once bound, tie off the cords at the top to avoid them from becoming undone.
How to fix headphone wires with tape?
1. Cut a piece of electrical tape large enough to cover the exposed wire.
2. Wrap the tape tightly around the wire, pressing down firmly to ensure it adheres.
3. Check the tape to ensure no gaps or tears in the covering.
4. Add a second piece of tape on top of the first layer, wrapping it around the damaged area a few times.
5. Once you’re finished taping, you can connect the headset to listen to ensure the audio isn’t distorted.
How to shorten headphone cable without cutting?
To shorten a headphone cable without cutting it, you can use Velcro straps, zip ties, rubber bands, or plastic cable ties to bundle the excess cable length.
Wrap the cable around your hand or another object to create a neat coil, then secure it with your chosen method.
Make sure to leave some slack near the headphone and audio device connection points to prevent strain on the cable and maintain flexibility.
This approach allows you to adjust the cable length as needed without permanently altering it
How to fix headphone wires near the jack?
To fix headphone wires near the jack, follow these steps:
1. Cut the damaged part of the wire near the jack.
2. Remove the rubber sheath to expose the inner wires.
Clean the enamel coating on the wires by sanding or burning it off with a lighter or soldering iron, exposing the copper.
3. If using an AUX cable as a replacement, cut the AUX cable and remove its rubber sheath, then clean the enamel on its wires.
4. Twist the corresponding wires together (e.g., left channel to left channel, right channel to right channel, and ground to ground).
5. Insulate the twisted wires using electrical tape or heat-shrink tubing.
6. Ensure that the wires are clean and free of oil before starting the repair process to ensure a secure connection.
Conclusion
Headphone cable management is essential for keeping your wires safe, organized, and free of tangles. Properly managing your headphone cables can extend their life and make using them more accessible.
Good cable management also means that your headphones can stay tangle-free and prevent them from coming apart or spooling up.
Knowing how to properly manage and care for your headphone cables can help keep them in excellent condition and make listening easier.
James Dimento is a Chief-in-Editor of SoundUnify. He is a headphone enthusiast and creative writer passionate about audio technology. He has three years of experience writing about headphones and sound quality and is responsible for creating reviews and taking care of all administration.
