To clean your Bose earbuds, use a dry cotton swab to wipe away any debris or wax buildup gently. Also, sanitize the ear tips regularly with alcohol wipes.
As an avid user of Bose earbuds, I know keeping them clean is essential for optimal audio quality and hygiene. However, with regular use, earbuds inevitably collect earwax and debris that can muffle the sound. And in the era of COVID-19, sanitizing our gadgets has become more crucial than ever.
In my experience, occasionally cleaning your Bose earbuds is easy to overlook but makes a big difference. Neglecting essential maintenance can degrade the sound and become pretty gross over time. Luckily, with some gentle wiping, sanitizing, and regular upkeep, you can keep your earbuds sounding crisp and looking like new.
Throughout this article, I’ll share tips for how to clean Bose earbuds safely. I’ll cover what supplies you need, how to wipe away buildup, and when to sanitize the ear tips. My goal is to help you keep your earbuds in great shape so you can enjoy excellent Bose audio for years to come.
Pre-Preparation Before Cleaning Bose Earbuds
Stepping into the world of earbud maintenance can be daunting. But worry not! I’ve broken down the first crucial steps for you. Let’s delve into the preparatory stage to set the foundation for a successful cleaning session.
1. Precautions Before Cleaning
Embarking on the cleaning journey of your Bose earbuds requires enthusiasm and a fair bit of prudence. The intricate design and delicate components of these earbuds demand meticulous care.
Before diving into the cleaning process, here are some paramount precautions:
- Disconnect from Power: Always, and I mean always, ensure your earbuds are disconnected from any power source or device. Electricity and moisture? They’re not the best of friends. This step helps to mitigate any potential risk of electrical mishaps.
- Manufacturer’s Guidelines: I revisit the user manual when cleaning my earbuds. Different models might have specific dos and don’ts. The manufacturer’s guidelines serve as a golden rulebook. You’d be surprised how often they contain nuggets of wisdom tailored to your earbud model.
- Assess Before Acting: Take a moment to drench any part of your earbuds. Assess the level of dirt or earwax buildup. A preliminary inspection can guide the depth and intensity of your cleaning, ensuring you don’t overdo it.
- Water is Not Always a Savior: This might sound counter-intuitive, but never submerge your earbuds entirely in water. It’s the quickest ticket to damaging the intricate internal components.
Precautions Table:
| Precaution | Reason | Tips |
|---|---|---|
| Disconnect from Power | Avoid electrical mishaps | Double-check connections before starting. |
| Manufacturer’s Guidelines | Tailored advice for your model | Keep the manual in an accessible place. |
| Assess Before Acting | Avoid over-cleaning | Use a magnifying glass for a closer look if needed. |
| Avoid Complete Submersion | Prevent internal damage | Use damp cloths or swabs; never soak. |
2. Materials Required for Cleaning
Ready to shine up those Bose earbuds? Ensuring you have the right tools at your disposal is half the battle. Let’s line up the materials that have been my trusty allies in this mission:
- Soft Cloth: Think of it as your workhorse. A gentle, non-abrasive, and versatile soft cloth is perfect for wiping down surfaces without risking scratches or damage.
- Hydrogen Peroxide: A bit of an ace up my sleeve. Especially for the stubborn grime or earwax. It’s potent, so always handle it carefully and use it sparingly.
- Cotton Swabs: Precision is the name of the game here. Cotton swabs are indispensable, especially for hard-to-reach areas like the mesh grille.
- Warm Water: The unsung hero. Lukewarm water, combined with gentle soap, can tackle most surface grime without being harsh on your earbuds.
- Mild Soap: We’re talking baby soap or gentle dish soap. They’re effective without being abrasive or laden with harsh chemicals.
- Small Bowl: This is where the magic concoctions happen. Handy for mixing or dipping.
Materials Table:
| Material | Purpose | Usage Tip |
|---|---|---|
| Soft Cloth | Wipe surfaces | Ensure it’s lint-free. |
| Hydrogen Peroxide | Remove stubborn grime/earwax | Use with caution. A little goes a long way. |
| Cotton Swabs | Clean intricate parts | Don’t oversaturate; it should be damp, not dripping |
| Warm Water | General cleaning | Always use lukewarm, not hot. |
| Mild Soap | Enhanced cleaning | Opt for unscented or baby soap. |
| Small Bowl | Mixing and holding solutions | Use glass or ceramic for easy cleaning. |
With these precautions and materials in place, you’re poised for a cleaning session that’s both effective and safe. Your Bose earbuds are in for a treat!
How to Clean Bose Earbuds?

Achieving pristine Bose earbuds requires a structured approach. You’re well on your way with the precautions and materials in place. Let’s break down the cleaning steps to get those earbuds looking and functioning at their best.
1. Exterior Surface Cleaning:
Your earbuds’ outer surface often comes in contact with oils and dirt from your fingers.
- Start by dampening the soft cloth with warm water. Avoid making it dripping wet.
- Gently wipe down the entire outer surface of the earbuds. Ensure you’re applying even, gentle pressure to avoid any damage.
- For stubborn spots, a drop of mild soap can be beneficial. Remember to rinse thoroughly to avoid residue.
2. Ear Tips Deep Cleaning:
The ear tips harbour the most grime due to direct ear contact.
- Begin by detaching the ear tips. Most Bose models allow for this.
- Fill your small bowl with warm water and add a few drops of mild soap. Stir to create a soapy mixture.
- Immerse the ear tips into this mixture and let them soak for a few minutes.
- Gently agitate the water to dislodge earwax or debris.
- Rinse the ear tips under running water, washing all soap away.
- Pat them dry with a soft cloth and let them air dry completely before reattaching.
3. How Do You Clean Earbuds Wax Mesh?
Earbud wax mesh acts as the first line of defense, preventing earwax and debris from infiltrating the sensitive components of your earbuds. Over time, this mesh can become clogged, reducing sound quality and comfort. Let’s explore the meticulous cleaning of this crucial part of your earbuds.
Understanding the Mesh Challenge:
- Nature of Earwax: Earwax, or cerumen, is naturally produced by our ears to protect and lubricate the ear canal. It’s sticky and waxy, making removing it challenging once it adheres to the mesh.
- Mesh Sensitivity: The mesh is finely threaded and delicate. Excessive force or the wrong cleaning tools can damage it, potentially ruining sound output or rendering the earbud unusable.
The Cleaning Steps:
- Preparation: Ensure the earbuds are disconnected from any power source. Lay out your cleaning tools in a well-lit area.
- Loose Debris Removal:
- Gently shake or tap the earbuds to dislodge loose debris from the mesh.
- A soft brush can gently brush off surface wax like a toothbrush with soft bristles.
- Using Hydrogen Peroxide:
- Dampen a cotton swab with a bit of hydrogen peroxide. This acts as a dissolving agent for the earwax.
- Gently dab the mesh. The bubbling action of hydrogen peroxide will start to break down the earwax.
- Allow it to sit for a minute, then gently wipe it with a dry cotton swab or soft cloth.
- Alcohol Wipe:
- For added cleanliness and to remove all residues, lightly dab the mesh with an alcohol wipe or a swab dipped in isopropyl alcohol.
- This will help in cleaning and quick-drying of the mesh.
- Air Dry: After cleaning, let the earbuds sit dry, ensuring all moisture evaporates.
- Final Check: Inspect the mesh to ensure it’s clean. Test the earbuds to make sure sound quality is restored.
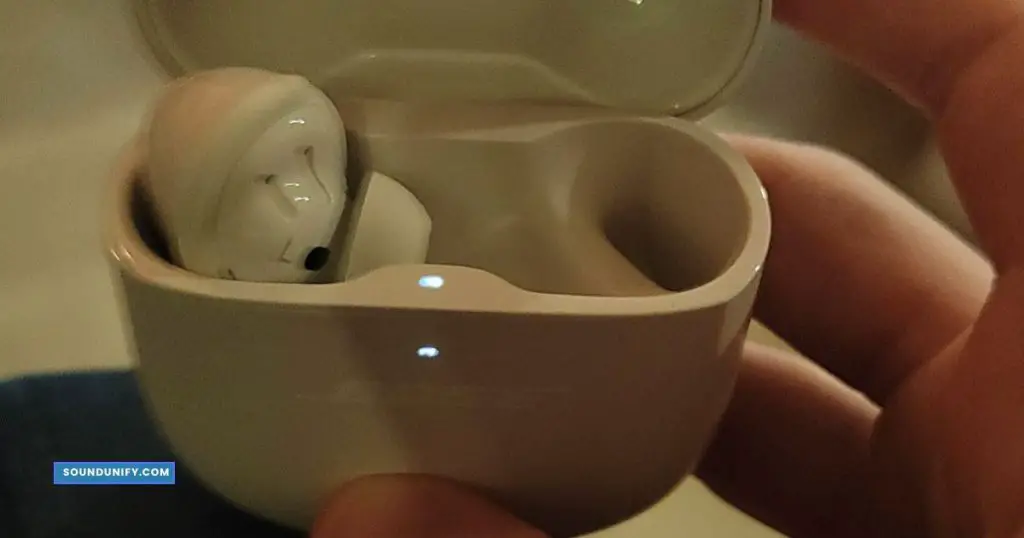
4. How to Clean Bose Earbuds Charging Case?
The charging case of your Bose earbuds isn’t just a carrying pouch; it’s a power bank and a protective home for your precious earbuds. Just as the earbuds collect earwax and debris, the charging case gathers dirt, grime, and dust from frequent handling and storage. Here’s how you can clean it efficiently:
Understanding the Case’s Vulnerabilities:
- Electronics Inside: Unlike the earbuds, the charging case contains the added complexity of charging electronics. Moisture is a serious adversary.
- Contact Points: These metal areas are essential for charging your earbuds. Over time, they can accumulate grime, affecting the charging process.
The Cleaning Steps:
- Preparation: Always start by disconnecting the charging case from any power source. Lay out your cleaning tools in a well-lit area.
- Exterior Wipe Down:
- Dampen a soft cloth with lukewarm water. Wring out excess moisture, ensuring it’s not dripping.
- Gently wipe the entire exterior of the case. If needed, a drop of mild soap can tackle stubborn spots. Rinse with a cloth dampened with clean water.
- Interior Cleaning:
- Use a dry, soft-bristle brush (like a toothbrush) to gently sweep away any dust or debris from the interior, focusing on the earbud slots.
- For harder-to-reach areas, a cotton swab can come in handy.
- Cleaning Contact Points:
- Dampen a cotton swab with isopropyl alcohol.
- Gently rub the metal contact points inside the case. This action not only cleans but also ensures good conductivity for efficient charging.
- Air Dry: Leave the case open and let it air dry completely. Ensuring all moisture has evaporated before placing earbuds back or charging is crucial.
- Regular Maintenance: While intensive cleaning might not be needed frequently, it’s a good habit to give your charging case a quick wipe-down regularly.
5. Maintaining Earbuds Post-Cleaning: Ensuring Longevity and Functionality
After cleaning your earbuds, following a few more steps is essential to guarantee their optimal performance and lifespan. Let’s delve deeper into the importance and methods of properly drying, reassembling, and storing your earbuds.
Drying the Earbuds:
Ensuring your earbuds are completely dry post-cleaning is paramount for their functionality and longevity. Water or moisture can damage the internal components. This leads to sound distortion, reduced lifespan, or complete malfunction. Additionally, a damp environment is an invitation for bacterial and fungal growth, raising hygiene concerns.
To dry your earbuds:
- Begin by gently shaking them to remove any excess water. This helps in dislodging water trapped in the nooks and crannies.
- Lay them on a soft, absorbent cloth in a well-ventilated area. Avoid direct sunlight or heat sources, as these can damage the delicate components and degrade the material of the ear tips.
- If you’re humid or want a more thorough drying process, consider placing your earbuds in a container with silica gel packets. These packets absorb moisture effectively, ensuring your earbuds are dry inside and out.
- Never use a hairdryer or place them on a heater, as direct heat can cause irreversible damage.
Reassembling the Earbuds:
Once your earbuds are dry, reassembling them correctly is crucial for optimal performance. Proper placement ensures sound quality remains intact and provides the desired noise isolation and comfort.
- Inspect the Parts: Before putting everything back together, ensure all components, especially the ear tips and mesh screens, are clean and completely dry.
- Alignment is Key: Ear tips usually have a specific way to fit onto the earbud nozzle. Make sure you align any notches or markings correctly.
- Secure Attachment: Push the ear tips onto the earbud nozzle until firmly in place. A snug fit prevents them from falling off during usage and ensures sound isn’t compromised.
- Test Them Out: It’s a good practice to test the earbuds once reassembled. This ensures that the sound channels are not obstructed, and everything is correct.
Storing Properly After Cleaning:
After cleaning and reassembling your earbuds, storing them properly ensures their protection from potential damage and maintains their performance.
- Protective Case: Always utilize a protective case or pouch for storage. This shield guards against dirt, debris, and physical damage. It’s a barrier between your cleaned earbuds and the external environment.
- Mind the Temperature: Extreme temperatures can be detrimental. Avoid storing your earbuds in hot cars or cold areas. Consistent room temperature is ideal.
- Cable Management: If your earbuds come with cables, avoid tightly winding them. A loose coil or using cable management tools can prevent tangling and reduce wear and tear. Remember, a damaged cable can compromise sound quality and the overall lifespan of your earbuds.
Adhering to these guidelines ensures your earbuds remain in top-notch condition, ready for countless more listening sessions.
Bose Earbuds Troubleshooting After Cleaning

Cleaning your Bose earbuds can occasionally lead to unexpected issues. However, don’t panic; most issues post-cleaning are typically due to moisture or reassembly mistakes.
Here’s a comprehensive troubleshooting guide for your Bose earbuds after cleaning:
1. Make Sure the Earbuds are Completely Dry
One of the foremost precautions post-cleaning is ensuring that the earbuds are moisture-free. Water or residual cleaning solution can harm the sensitive electronic components housed within.
While many modern earbuds come with some degree of water resistance, it does not necessarily make them impervious to damage from trapped moisture. Therefore, before using, recharging, or storing them, let the earbuds air dry in an excellent, ventilated space.
Avoid speeding up the drying process using heat sources like hair dryers, as direct heat can degrade the materials and damage the internals. Desiccants like silica gel packets can effectively draw out trapped moisture if you suspect deeper moisture penetration.
2. Reset the Earbuds
Resetting your earbuds can resolve a multitude of issues, especially post-cleaning. It’s akin to giving them a fresh start.
- Step 1: Power Off the Earbuds. Before initiating a reset, ensure your earbuds are turned off.
- Step 2: Press and Hold. Depending on the Bose earbuds model, there will be a combination of buttons to press and hold for a specific duration (usually the power button or the Bluetooth button) until you see a light indicator or hear a sound that confirms the reset.
- Step 3: Disconnect from Device. In your phone or other paired devices, forget the Bose earbuds from the list of Bluetooth devices.
- Step 4: Repair. After resetting, please turn on your earbuds and pair them again with your device.
3. Check the Eartips
The ear tips play a pivotal role in the user experience. They ensure a snug fit, optimal sound isolation, and overall comfort. Post-cleaning, it’s crucial to inspect the ear tips.
Check if they are correctly and securely attached. Ensure you haven’t mixed up sizes – using the wrong size can lead to discomfort and reduced sound quality. Also, inspect them for any wear and tear.
Damaged ear tips can diminish the listening experience and might even allow moisture ingress during future cleanings.
4. Update the Earbuds’ Firmware
Staying updated with the latest firmware can rectify existing issues and enhance functionalities. Manufacturers frequently release updates to improve product performance, patch software bugs, or enhance device compatibility.
To update your Bose earbuds:
- Connect to the App: Many Bose earbuds can be managed and updated via the Bose Connect app. Ensure your earbuds are connected to the app.
- Look for Updates: Within the app settings or on the main page, there should be an option to check for software/firmware updates.
- Download and Install: If an update is available, follow the on-screen instructions to download and install the update. Keep the earbuds connected throughout the process.
5. Repair the Earbuds
If your Bose earbuds aren’t functioning as expected post-cleaning, and the steps above didn’t resolve the issue, it might be time to consider professional repair.
- Step 1: Document the Issue. Clearly outline the problem to avoid miscommunication. Note when it started and any triggers.
- Step 2: Check Warranty Status. If your earbuds are still under warranty, Bose might offer a free or reduced-cost repair. Always consult the warranty terms and conditions.
- Step 3: Contact Bose Customer Support. Describe the problem, and they can guide you on the next steps – troubleshooting or repair.
- Step 4: Visit a Certified Repair Center. If advised to get a repair, take your earbuds to a Bose-certified repair center. Avoid unauthorized centers as they might use non-genuine parts.
Professional repair is always the safest route, especially when dealing with delicate electronics.
FAQs
Q: What is the best way to clean Bose earbuds?
A: The best way to clean Bose earbuds is by using a soft, dry cloth or tissue to gently clean the earbuds and remove any dirt or debris on either the mesh surface or ear tips.
Q: Can I use rubbing alcohol to clean Bose earbuds?
A: It is not recommended to use rubbing alcohol to clean Bose earbuds as it may damage the headphones and earbuds.
Q: How often should I clean my Bose earbuds?
A: It is recommended to clean your Bose earbuds regularly to keep them free of debris and ensure optimal sound quality.
Q: How do I clean my Bose earbuds’ ear tips and mesh grilles?
A: You can clean the ear tips and the mesh grilles of your Bose earbuds by gently scrubbing them with a soft, dry cloth or using a small amount of hydrogen peroxide on a soft cloth or tissue to remove any wax or dirt.
Q: Can I wash my Bose earbuds with water?
A: No, you should not wash your Bose earbuds with water as it may damage the electronics. Instead, use a soft, dry cloth or tissue to clean them gently.
Q: Can I use Q-tips to clean my Bose earbuds?
A: Using Q-tips to clean your Bose earbuds is not recommended, as they may leave fibers behind and potentially damage them.
Q: How do I clean earwax from my Bose earbuds?
A: To clean earwax from your Bose earbuds, gently scrub the mesh grilles with a soft, dry cloth or tissue to loosen and remove the earwax.
Final Thoughts
Cleaning Bose earbuds enhances performance. Regular care prevents wear and tear. A damp cloth, gentle touch – that’s the key. Avoid submerging in water! Remember, moisture is an enemy.
Dry them naturally; resist the hairdryer temptation. Use the right tools. Gentle cleaning agents are best. Prioritize ear tip hygiene. Done correctly, your music remains pure, crisp, and uninterrupted. A simple routine keeps your earbuds pristine. Happy listening!
James Dimento is a Chief-in-Editor of SoundUnify. He is a headphone enthusiast and creative writer passionate about audio technology. He has three years of experience writing about headphones and sound quality and is responsible for creating reviews and taking care of all administration.