
Jaybird headphones not charging can be incredibly frustrating. But don't worry. There are several solutions to get them powered up again.
I know how annoying it is when you’re all set for a run or a workout, and your Jaybird headphones won’t charge. It feels like your plans are ruined before they even start, right?
This post will delve into this common issue and explore its possible reasons. Maybe it’s a faulty charging cable, a drained battery, or a more profound internal issue.
We’ll walk through some troubleshooting steps and potential fixes to help you get back to your music and podcasts without delay.
Stick around to find out how to resolve this charging dilemma and prevent it from happening. Let’s dive in and get those headphones working again!
Common Causes of Jaybird Headphones Won’t Charge

If you’re having a bit of a struggle with your Jaybird headphones not charging, you’re not alone! I’ve been through it and found that there could be a few reasons why this might be happening.
Let’s dive in and explore them!
1. Not Inserted Correctly in the Charging Case
One of the primary reasons Jaybird headphones might not charge is that they are not inserted correctly in the charging case.
It’s easy to overlook, but ensuring that the headphones are snugly and accurately positioned is paramount.
If they’re slightly off or not seated well, the charging contacts won’t align, preventing the charging process. Always double-check the positioning of the headphones in the case to ensure they’re charging as they should.
2. The Charging Case Lid is Not Closing or Working Properly
A frequently overlooked aspect of the charging process is the integrity of the charging case lid. If the lid isn’t closing securely or has been damaged, it can interrupt the charging process.
The lid is pivotal in ensuring the headphones remain in place and maintain contact with the charging points.
| Issue with Lid | Potential Solution |
|---|---|
| The lid doesn’t close securely | Check for obstructions or debris |
| Damaged or broken lid | Consider replacing the charging case |
| Loose hinge | Ensure the hinge is free from dirt and is properly aligned |
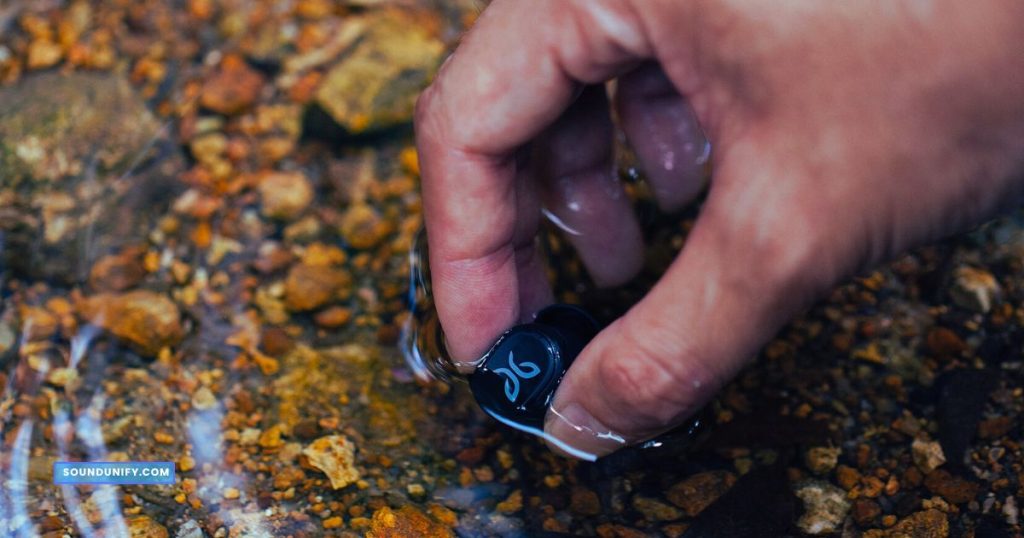
3. Dirt or Dust Might Cause
Dirt and dust can be silent culprits behind charging issues. Their accumulation can lead to several problems:
- Blocked Ports: Over time, dirt accumulates and blocks the charging ports, preventing a secure connection.
- Impaired Contact Points: Dust can settle on the contact points, disrupting the charge.
- Degraded Lid Integrity: Dirt and debris can prevent the lid from closing properly.
Regular cleaning and maintenance can help prevent these issues and ensure a consistent charging experience.
4. Contact Points on the Buds
The contact points on the buds are the lifeline for charging. If they’re compromised in any way, it can lead to inconsistent or failed charging.
These points need a secure connection with the charging case to work. Over time, they can become dirty or corrupted, leading to charging issues.
Pro Tip: Use a soft, lint-free cloth to clean the contact points regularly. If there’s visible corrosion or buildup, a gentle rub with an eraser can help remove it. Always store your headphones in a clean, dry place to minimize exposure to elements that can degrade the contact points.
5. The Charging Port May be Clogged
A common yet often overlooked issue is the possibility of clogging the charging port. If the charging cable is dirty or has lint, it can cause problems during the charging process.
- Regular Inspection: Inspecting the charging port regularly for any visible obstructions is essential.
- Gentle Cleaning: Use a small, soft brush or compressed air to remove any debris from the port gently.
- Proper Storage: Store the headphones in a clean, dry place to minimize exposure to dust and lint.
6. Software Issue
Software issues can be subtle and not immediately apparent, but they can significantly impact the charging process.
Outdated or corrupt software can prevent the headphones from charging properly and resolving such issues can often restore normal functionality.
| Software Issue | Potential Solution |
|---|---|
| Outdated Software | Update to the latest firmware version |
| Corrupt Software | Perform a hard reset or contact manufacturer support |
| Charging Interruptions | Ensure software is stable and free of bugs |
7. Unused for a Long period
Leaving the headphones unused for long can lead to battery degradation and discharge.
When headphones are left unused, the battery continues to discharge slowly. And if left for an extended period, it might not respond to charging initially.
It’s crucial to charge the headphones periodically, even if not in use, to maintain battery health and ensure they are ready to use when needed.
8. Power Source
The power source is a fundamental aspect of charging, and an unreliable or incompatible one can lead to charging failures. Using the correct and reliable power source is crucial for successful charging.
| Power Source | Recommendation |
|---|---|
| Wall Outlet | Use a wall outlet that is known to be reliable and delivers the correct voltage. |
| USB Port | Ensure the USB port is functional and provides sufficient power. |
| Power Bank | Use a power bank with the correct output that is fully charged. |
Remember, a consistent and reliable power source ensures that your headphones get the right power and can charge effectively without interruptions.
How to Troubleshoot Jaybird Headphones Not Charging?

If your Jaybird headphones are giving you a hard time and not charging, don’t worry! I’ve been there and have some tips and tricks to help you troubleshoot and get back to your tunes quickly!
1. Cleaning the Charging Contacts and Source
Ensuring the charging contacts and source are clean is paramount for a successful and efficient charging process.
Over time, dirt, dust, and other debris can accumulate on these components, leading to a disrupted or inefficient charge.
Here’s an in-depth guide on how to meticulously clean them:
- Understand the Importance: The charging contacts and source are the primary conduits for electricity. Even a slight obstruction can impede the flow, leading to charging issues. I’ve often found that a simple cleaning can make a difference.
- Gather Necessary Supplies:
- A soft, clean toothbrush or a lint-free cloth.
- Isopropyl alcohol (preferably 70% or higher).
- Cotton swabs.
- Cleaning the Charging Contacts:
- Disconnect the headphones from any power source. Safety first!
- Dip the cotton swab lightly in the isopropyl alcohol. Ensure it’s damp, not dripping.
- Gently rub the charging contacts on the headphones using the damp cotton swab. The goal is to remove any visible dirt or residue.
- For stubborn dirt or grime, use the soft toothbrush to brush away any particles gently.
- Let it air dry for a few minutes before attempting to charge again.
- Cleaning the Charging Source:
- If you’re using a charging case, repeat the abovementioned steps for the contacts inside the case.
- Ensure USB ports or wall outlets are powered off or unplugged. Then, using a new damp cotton swab, clean around the edges and inside the port gently. This step is crucial, especially if you’ve noticed any debris inside.
- Regular Maintenance: While cleaning when you face issues is essential, I recommend making this a monthly routine. Regular maintenance can prevent buildup and ensure consistent charging.
Ensuring that both the charging contacts are on your Jaybird headphones. The clean charging source sets the stage for an efficient and effective charging process. It’s a simple step that can significantly impact the longevity and performance of your device.
2. Checking the Charging Cable
The charging cable is a crucial component in the charging process, and any faults or damages to the cable can lead to charging failures.
A meticulous inspection of the charging cable is essential to ensure it’s in optimal condition. When I check my charging cable, I look for signs of wear, tear, fraying, or any damage that might impede the charging process.
It’s crucial to ensure the cable is physically intact and capable of transmitting power efficiently.
Inspection Guide:
- Visual Inspection: Start by visually inspecting the entire length of the cable. Look for any signs of damage, such as cuts, kinks, or exposed wires.
- Connectivity Check: Ensure the cable connects securely to the charging port and power source. A loose connection can be as detrimental as a damaged cable.
- Functionality Test: After visual inspection and ensuring secure connectivity, test the cable’s functionality by attempting to charge the headphones. If the headphones don’t charge, the cable is likely faulty.
| Inspection Step | Action | Purpose | Resolution |
|---|---|---|---|
| Visual Inspection | Examine the cable thoroughly | To identify visible damages | Replace if damaged |
| Connectivity Check | Connect to port and source | To ensure secure connections | Adjust connection if loose |
| Functionality Test | Attempt to charge headphones | To test the cable’s efficacy | Replace if non-functional |
Remember, a faulty charging cable is a common and easily overlooked cause of charging issues. Regular checking and replacing broken cables can keep you from having problems with your charging.
3. Trying Different Power Sources
When faced with charging issues, it’s essential to consider the possibility that the power source might be the root of the problem. Switching to a different power source often resolves the issue and is a critical step in troubleshooting.
Using a USB port on a computer or a laptop might not supply adequate power, especially if it’s a low-powered port. Switching to a wall outlet can make a significant difference in such cases.
Similarly, if you already use a wall outlet, try a different one or a reliable power bank. Experimenting with various power sources can help identify whether the issue is with the headphones or the power source itself.
This allows you to take appropriate corrective measures. It’s a simple yet effective step in ensuring your Jaybird headphones receive the needed power.
4. Resetting the Jaybird Earbuds
Resetting the Jaybird earbuds can be a pivotal step when troubleshooting charging issues. It can help resolve software glitches that might prevent the earbuds from charging.
Performing a reset can restore the earbuds to their default settings, potentially resolving any anomalies.
It’s a more nuanced step aimed at addressing issues not determined by simpler troubleshooting measures.
Step-by-Step Guide:
- Turn Off the Earbuds: Ensure that your Jaybird earbuds are turned off.
- Locate the Reset Button: The reset button is typically found on the earbud or the charging case. Refer to the user manual if you have difficulty locating it.
- Press and Hold the Reset Button: Use a paperclip or a similar object to press and hold the reset button for about 10 seconds or as specified in the user manual.
- Observe the LED Lights: The earbuds usually indicate the reset with a flashing LED light. Wait for the confirmation before releasing the button.
- Reconnect to Your Device: After the reset, reconnect the earbuds and check if the charging issue is resolved.
| Step | Action | Purpose | Observation |
|---|---|---|---|
| 1 | Turn off the earbuds | To safely initiate the reset | – |
| 2 | Locate the reset button | To initiate the reset process | Refer to the manual if needed |
| 3 | Press and hold the reset button | To reset the earbuds | Hold for a specified time |
| 4 | Observe the LED lights | To confirm the reset | Flashing LED indicates reset |
| 5 | Reconnect to your device | To test if the issue is resolved | Check charging status |
Caution:
- Refer to the User Manual: Before performing a reset, refer to the manual for specific instructions for your Jaybird model. Different models might have varying reset procedures.
- Avoid Frequent Resets: While resetting can resolve issues, frequent resets can potentially lead to other complications. Use this option judiciously.
Remember, resetting is a comprehensive step aimed at addressing deeper issues. It should be performed cautiously and per the specified instructions to avoid unintended consequences.
5. Contacting Jaybird Customer Support
When all troubleshooting steps have been exhausted, and the Jaybird earbuds won’t charge issue persists, it’s time to reach out to Jaybird Customer Support.
Contacting customer support can provide expert advice and possibly a resolution to the charging issues you are experiencing. The team helps with problems and can help you with more troubleshooting steps or replace things if needed.
Engaging with customer support can be a crucial step in resolving more complex issues that can’t be addressed with standard troubleshooting. It’s the pathway to professional assistance and ensures you receive accurate advice and the right solutions.
Jaybird Earbuds Charging Tips
I’ve been diving deep into the world of Jaybird earbuds and gathered some handy charging tips just for you.
Let’s get those earbuds juiced up and ready to jam:
- For Jaybird Freedom Lovers: Attach the charging clip securely to the controller’s back. Then, pop the micro USB end of the cable with it into the charging clip. Easy peasy!
- Rocking the Jaybird Run: Patience is key! It takes about 3 hours to get the charging case all powered up from a low battery. But here’s the cool part: Once it’s complete, you’ll get two full charge cycles for your earbuds, giving you an extra 8 hours of groovy tunes.
- For My Jaybird Tarah Fans: Stick to a 5V 500mA USB power source when charging. Trust me; anything more than 5.5 V might not be too friendly with your earbuds. Safety first!
- All About Jaybird Vista Earbuds: Pop those earbuds into their charging case, and they’ll start charging as soon as you close the lid. From a completely drained state, it’ll take up to 2 hours to fully charge them, giving you a solid 6 hours of playback. And if you’re ever in a rush, a quick 5-minute charge will gift you about an hour of music. As for the charging case, it takes around 2 hours to charge from empty. Once it’s complete, you can recharge your earbuds 1.5 times, up to 10 more hours of jamming out!
Encountering Some Charging Hiccups?
- Some fellow users have shared a cool trick: Do a soft reset by placing the earbuds back in the charging case, closing the lid, and plugging the case in to charge.
- Another tip from the community: Press the earbuds firmly against the magnetic contacts in the case. It seems to help the case recognize the earbuds better.
I hope these tips help you out! Keep the music playing, and enjoy your Jaybird earbuds to the fullest!
FAQs
Why won’t my Jaybird headphones charge?
There could be several reasons why your Jaybird headphones won’t charge. It could be due to issues with the charging pins in the charging case, a faulty charger, or a problem with the earbud itself.
What should I do if my Jaybird Vista earbuds are not charging?
If your Jaybird Vista earbuds are not charging, you can try a few troubleshooting steps. First, make sure that the charge pins in the charging case and on the earbud are clean and free from any dust or debris. You can gently wipe the charge contact points with a cloth or blow on them to remove dust. If that doesn’t work, try using a different charger or connecting the earbud to a different power source.
How do I pair my Jaybird Vista earbuds?
To pair your Jaybird Vista earbuds with a device, make sure that the earbuds are charged and turned on. Then, go to the Bluetooth settings on your device and select “Jaybird Vista” from the list of available devices. Follow the on-screen prompts to complete the pairing process.
Can I use any charger to charge my Jaybird Vista earbuds?
Using the charger that came with your Jaybird Vista earbuds is recommended to ensure optimal charging performance. However, you can also use any standard USB charger with a compatible charging cable.
What should I do if my Jaybird Vista 2 case is not charging?
If your Jaybird Vista 2 case is not charging, check if the charge pins and earbuds are clean and free from obstructions. You can use a cloth or a soft brush to clean the charge contact points. If the problem persists, use a different charging cable or connect the case to a different power source.
How do I reset my Jaybird Vista earbuds?
To reset your Jaybird Vista earbuds, place them in the charging case and ensure they are connected to a power source. Then, press and hold the button on the back of the charging case until the LED indicator flashes red for 4 seconds. Release the button, and your earbuds will be reset.
Can I pair my Jaybird Vista earbuds with a Samsung phone?
Yes, you can pair your Jaybird Vista earbuds with a Samsung phone or any other Bluetooth-enabled device. Simply follow the pairing instructions specific to your device to establish a connection.
Wrapping Up
It’s been enlightening diving into the world of Jaybird charging woes! It’s all about those little details: secure connections, clean ports, and regular updates.
Regular maintenance can ward off those charging troubles, keeping the tunes flowing and the vibes going. It’s been a journey of discovery, and I’m glad to share these nuggets of wisdom. Keep rocking and rolling with your Jaybirds!
James Dimento is a Chief-in-Editor of SoundUnify. He is a headphone enthusiast and creative writer passionate about audio technology. He has three years of experience writing about headphones and sound quality and is responsible for creating reviews and taking care of all administration.